

My Work
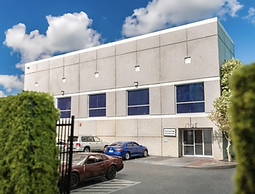
"Why the Dunder Mifflin office?" – I selected the office building from The Office because it is a recognizable workspace with unique interior and exterior features. Recreating a familiar fictional environment challenged me to translate media references into a physical architectural model.

Week 01
Research
I focused on gathering reference images and studying the overall appearance of the Dunder Mifflin office building. Since no official floor plans were available, I analyzed scenes from the show to estimate the layout, proportions, and recognizable design elements. This stage helped me understand how I would approach recreating the building through observation and architectural reasoning.
Week 02
Base + Walls
I began constructing the physical foundation of the model. I measured and cut the base board, then started assembling the exterior walls to establish the building’s shape and footprint. This phase required careful planning because the structure needed to be stable while also matching the visual proportions I had estimated from my references.

Week 03
Structure
I expanded the model by adding interior walls and additional structural details. This step helped define the office layout and made the model feel more realistic. I also made adjustments where necessary, learning that architectural projects often require revision and problem-solving throughout the building process.
Week 04
Details + Touch-ups
I focused on completing the model through painting, touch-ups, signage, and exterior details. These finishing elements improved the overall presentation and realism of the project. This final stage showed me how small details can have a major impact on the success and professionalism of a design.


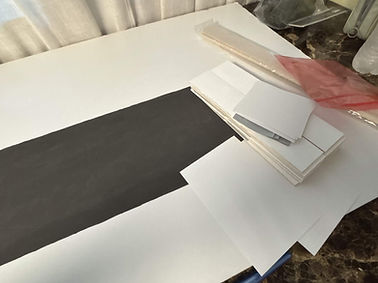
Materials + Construction
The construction of my model required selecting materials that were lightweight, easy to shape, and durable enough to hold the structure together. I primarily used foam board for the base and walls because it provided a strong foundation while still being simple to measure and cut. Additional materials such as cardboard, wood pieces, glue, paint, and decorative supplies were used to create smaller structural details and improve the overall appearance of the building. Each material was chosen for a specific purpose, similar to how architects and builders select materials based on function, cost, and design needs. The building process began with measuring and cutting the base with balsa wood to establish the footprint of the structure. From there, I constructed the exterior walls first so the overall shape of the building could be defined before adding smaller features. Wood glue was used carefully to keep walls aligned and secure, while repeated adjustments were made whenever pieces did not fit properly. After assembly, I painted sections and added finishing touches to create a cleaner, more realistic final presentation. Through this stage of the project, I learned that construction is rarely a perfect one-step process. It requires patience, precision, and the ability to revise plans when materials behave differently than expected. This part of the project helped me better understand how architects transform ideas into physical forms through planning, experimentation, and hands-on problem-solving.